• +566 4774 9930; +566 4774 9940
  • ALL WEEK FROM 9 AM TO 9 PM

How to Wet Felt A Coin Purse | Wet Felting Projects to Try | Wet Felting Tutorial For Beginners

by kevin chai on May 05, 2022
 
The small coin purse in the picture above is adorable, right? This kind of bag making requires two critical production processes, wet felting, and needle felting. First, the main body of the coin purse is made with wet felting, and then the pattern and image you want are made with needle felting. Today we will only talk about using wet felting to make purses. If you want to make cute animal bags like the picture above, you can refer to our other tutorials.
 
Today this video tutorial comes from Cat Clan Creative Arts(猫族创艺), and they are very good at making cute handicrafts, in addition to needle felting, wet felting, embroidery, puppet making, and so on. In this video tutorial today, I will introduce the basic making of wet felt bags. Whether small or large, it is the same method, but the tools used are slightly different. If you are a newbie, then you will learn a lot.


Take an appropriate amount of gray wool and divide it into six parts.
 
Then take first piece of wool and wrap it around a big foam ball (and there is a small foam ball later)
 
It should be noted here, use a needle to stab diagonally so that the two ends of the wool strip are connected, just wrapped on the foam ball, do not stab vertically, do not stab on the foam ball
 
Take the second piece of wool, wrap it vertically (cross) on the wool just now, and use a coarse needle to connect the ends of the wool top.
 
Then spread out the wool and stab the gaps together with a needle so that the wool completely wraps the foam ball.
 
Continue to wrap the third, fourth, and fifth pieces of wool so that the wool evenly wraps the foam ball.
 
The sixth piece of wool is checked and filled, and where it is uneven, it will be filled.
 
The main body of the pouch is basically completed
 
Next, start the process of wet felting. Prepare the following tools, ziplock bag (or foam net), warm water, and soap as shown in the photo below.
 
First, put the ball into a ziplock bag, then pour warm water in it.
 
Hold with both hands, squeeze, let the wool ball be fully soaked in warm water.
 
Pour off the remaining water
 
Then start soaping the wool ball so that the ball's surface is evenly wiped with the soap.
 
Then seal the bag and start rubbing
 
Use both hands to rub for ten minutes, not too hard to avoid uneven thickness of the wool ball. After seven or eight minutes, you can increase the intensity appropriately. Because at this time, the wool ball has been felted
 
Take out the wool ball, rinse off the foam with water, and clean the wool ball with a towel. At the same time, absorb the moisture.
 
The wool ball can be cut with a knife. Do not open too much. You can open a small mouth first and then increase the opening according to the size of the mouth
 
After taking out the big foam ball, put in the small foam ball, this is because we are going to felt the inside of the ball next
 
Repeat the process just now, add warm water, and wipe the soap evenly. Then seal the bag and rub
 
After ten minutes, wash the balls, absorb the moisture, and allow the wool balls to dry thoroughly, either by placing them in a ventilated place to dry or by blow-drying them with a hairdryer.
 
Take out the foam ball
 
Next, start to sew the metal purse frame to the wet felt pouch.
 
First use the sewing thread to fix the metal purse frame at the opening. There is no need for aesthetics here, because these thread are only for fixing the metal purse frame temporarily, and they will be removed later.
 
Use an awl to stab all the felt at the opening into the gap in the metal purse frame.
 
Then take out the gray thread of the same color as the pouch, and sew the metal purse frame along the needle holes on it.
 
Each stitch goes through the hole in the metal purse frame. This will allow the metal purse frame to be fully fixed
 
When sewing to the end, sew a few more rolls, which is more secure
 
Remove the fixing white thread.
 
The coin purse is done. If you want to stab out a cute animal pattern, you can make it on the pouch at this time.

Related Posts

  • Crafting Whisker-Soft Magic: Needle Felted Cat Paw Tutorial!
    Crafting Whisker-Soft Magic: Needle Felted Cat Paw Tutorial!

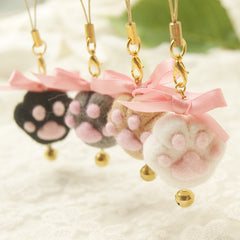
    Unleash your inner feline fancier with our enchanting tutorial on crafting an irresistibly cute needle felted cat paw! In this video, we'll lead you through the artful process of sculpting a lifelike miniature cat paw using the magical technique of needle felting.

  • Needle Felting Tutorial: Crafting an Adorable Hamster Companion
    Needle Felting Tutorial: Crafting an Adorable Hamster Companion

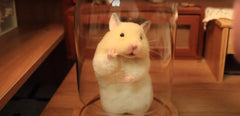
    In this delightful video tutorial, we'll guide you through the enchanting process of creating a cute and cuddly hamster using the art of needle felting. This beginner-friendly project is perfect for both seasoned crafters and those new to the world of felting.

  • Crafting Cuteness: Needle Felting a Playful Corgi Butt!
    Crafting Cuteness: Needle Felting a Playful Corgi Butt!

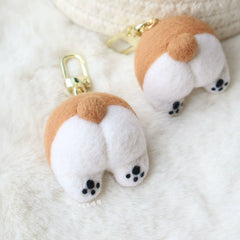
    Step into the whimsical world of needle felting with our delightful tutorial on creating an adorable corgi butt! In this video, we'll guide you through the process of sculpting a lifelike miniature corgi derrière using the art of needle felting.

  • Needle Felting Magic: Create a Bunny Hair Band for Halloween Fun!
    Needle Felting Magic: Create a Bunny Hair Band for Halloween Fun!

     Get ready to hop into the Halloween spirit with our enchanting DIY tutorial on crafting a Bunny Hair Band using the mesmerizing art of needle felting. This delightful accessory will not only add a whimsical touch to your costume but also showcase your crafting prowess.

  • Needle Felting Fun: DIY Hamster Coin Pouch Tutorial and More Creative Ideas
    Needle Felting Fun: DIY Hamster Coin Pouch Tutorial and More Creative Ideas

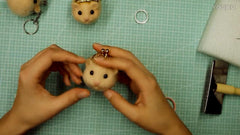
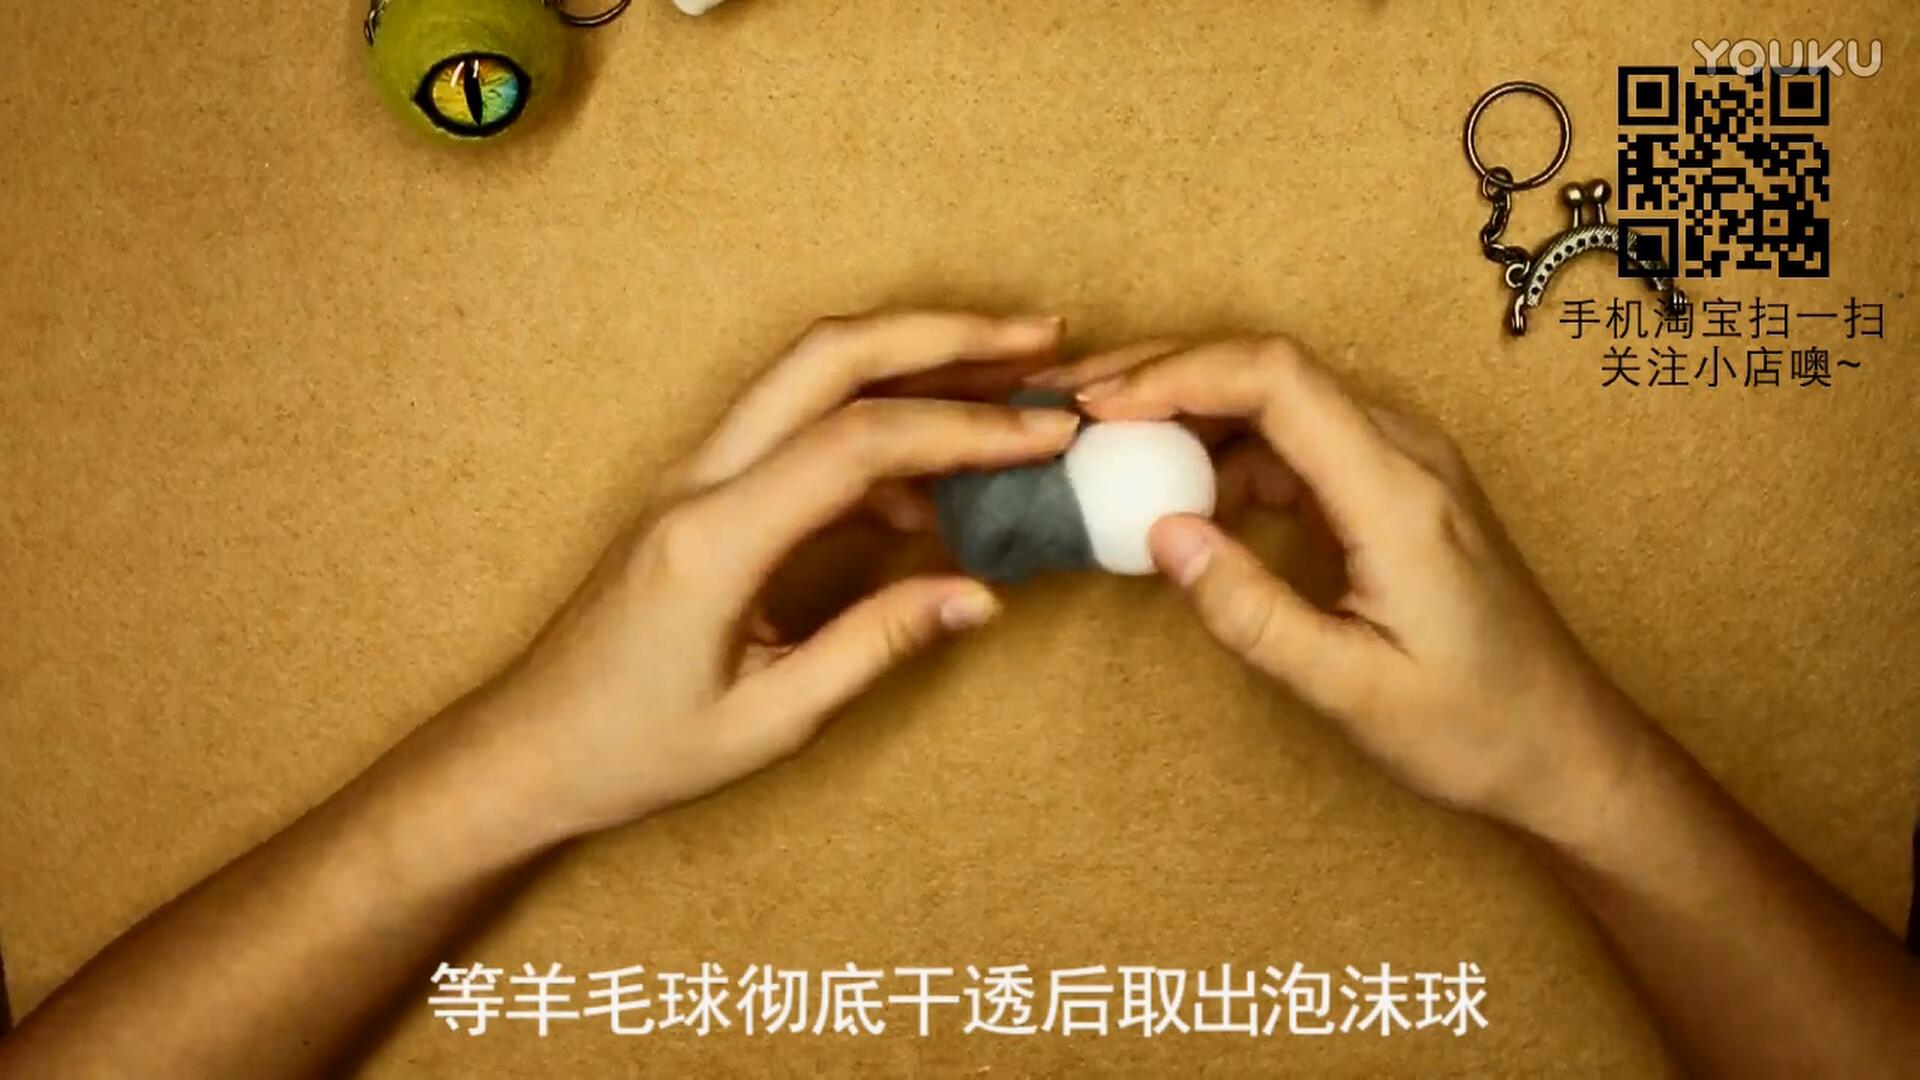
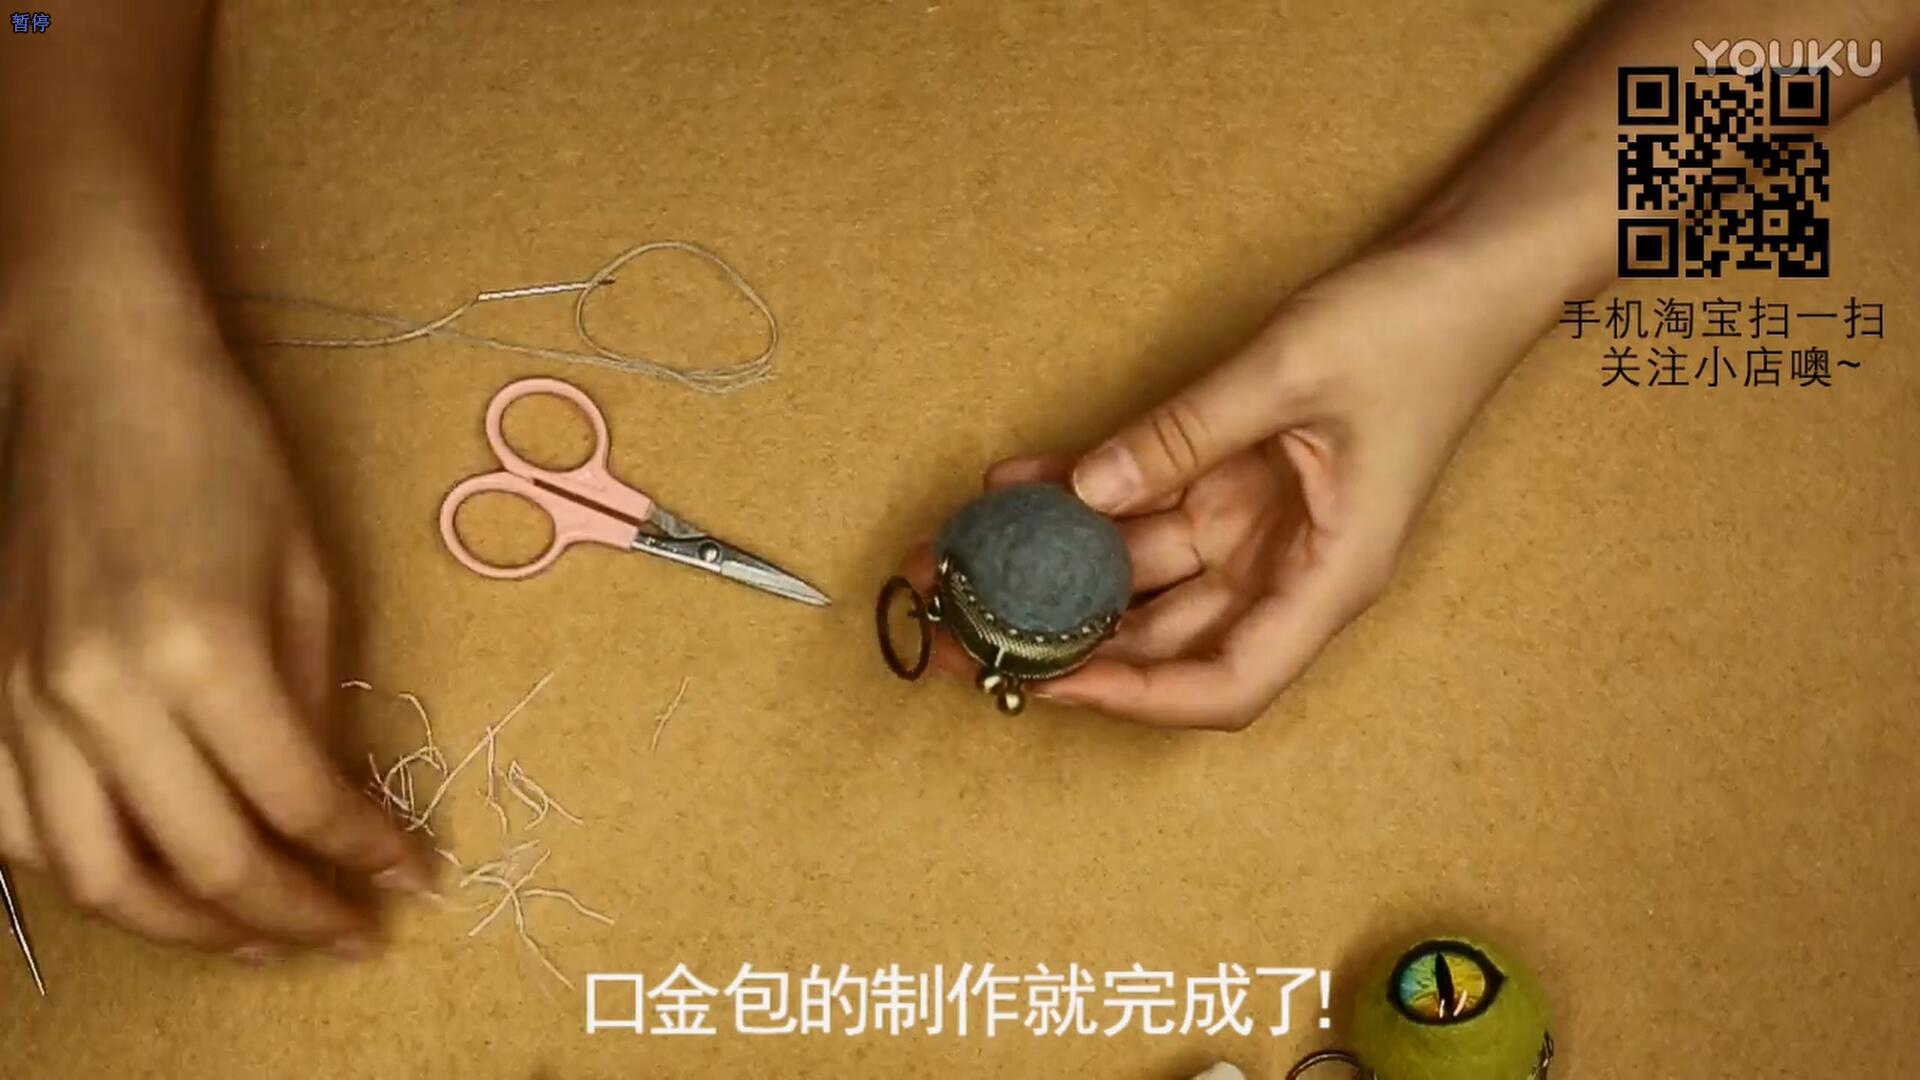
    Welcome to the magical world of needle felting! In this captivating video, we'll guide you through the process of creating an adorable hamster coin pouch using the needle felting technique. But that's not all – we have a treasure trove of creative ideas in store for you!

  • Colorful Whimsy: Beginner's Guide to Crafting a Vibrant Needle Felted Ball
    Colorful Whimsy: Beginner's Guide to Crafting a Vibrant Needle Felted Ball

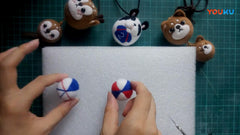
    If you're a beginner eager to delve into the world of needle felting, there's a fantastic video tutorial available that will guide you through creating a needle felted colorful ball. This video tutorial is perfect for those starting out and looking for an engaging and informative resource.

  • From Wool to Wonder: Needle Felting Ideas - Creating a Luffy Portrait
    From Wool to Wonder: Needle Felting Ideas - Creating a Luffy Portrait

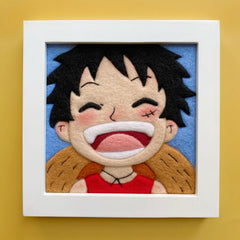
    In this captivating video tutorial, viewers are taken on an artistic journey into the whimsical world of needle felting as they learn how to create a charming needle felted portrait of the beloved anime character, Luffy. With expert guidance and a medley of colorful wool fibers, the video showcases

  • How to Make A Needle Felted Bulldog Into A Key Charm
    How to Make A Needle Felted Bulldog Into A Key Charm

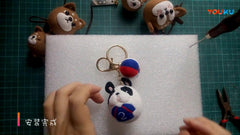
      This video tutorial comes from Mr.ALMOST. They are very good at making cute needle felted animal charms. We will introduce more video tutorials of them in the future.   This tutorial is very similar to the tutorial in March, the difference is that that one is made into a bag charm, this one is mad

LEAVE A COMMENT

Please note, comments must be approved before they are published


BACK TO TOP